REVIEW · SWEDEN
The Ultimate Aurora Photo Adventure
Book on Viator →Operated by Lights Over Lapland · Bookable on Viator
Abisko is one of Northern Europe’s best bets for aurora photos. I like that this tour starts with hotel pickup so you ease into the cold, and I also like the focus on getting you shooting fast with a preset DSLR + tripod. One thing to keep in mind: the northern lights are never guaranteed, and if skies don’t cooperate you may end up waiting longer in one spot with only muted results.
The experience is run as a hands-on photo outing, not just a sit-and-hope event. You’ll be taught the basics, given proper warmth gear (including warm overalls and a head lamp), and then the night plan shifts based on the aurora forecast and conditions.
In This Review
- Key highlights worth planning around
- Abisko is the reason this works: clear-sky odds and dark skies
- Price and value: what your money actually pays for
- The pickup at 7:15–7:45: a cold start you don’t have to manage
- What’s included (and what’s not) so you don’t get stuck
- Included equipment and comfort items
- Not included but important
- The camera lesson that makes your photos better fast
- Three chasing options: on foot, by 4×4, or out by sleigh
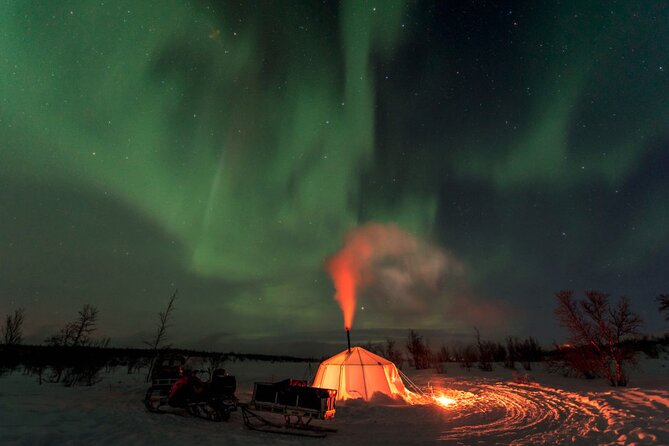
- Option 1: chasing by foot near a teepee
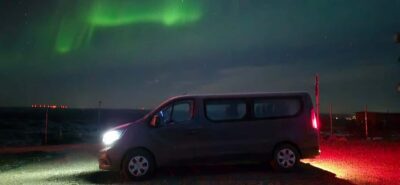
- Option 2: a modern 4×4 van to chase the lights
- Option 3: sleigh ride to a wilderness camp behind a snowmobile
- Stop in Abisko National Park area: what the night actually feels like
- Group size: why max 8 is a big deal at night
- How to set expectations so you leave happy
- Who this tour fits best (and who might want a different plan)
- Should you book the Ultimate Aurora Photo Adventure?
- FAQ
- How long is the Northern Lights photo adventure?
- What time does the tour start?
- Is hotel pickup included?
- What gear do I get for aurora photography?
- Do I need to bring an SD card?
- Are heavy-duty arctic boots included?
- What options do you use to chase the aurora?
- What if the sky is cloudy or aurora activity is low?
- Can I cancel for a full refund?
Key highlights worth planning around
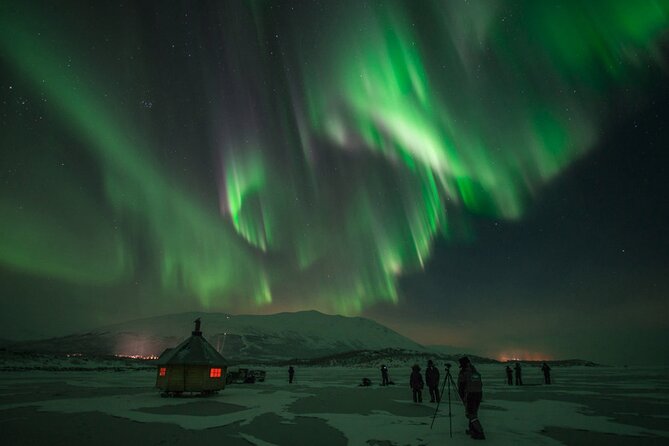
- Small group (max 8) means more time for your questions and quicker help with camera setup
- DSLR camera, lens, tripod, warm overalls, head lamp are all provided so you can travel lighter
- Three chasing styles (on foot, 4×4 van, or sleigh to a camp) depending on weather and activity
- Hot drinks and snacks keep you comfortable while you wait for the lights
- Abisko National Park area is chosen for its tendency toward clearer skies
Abisko is the reason this works: clear-sky odds and dark skies
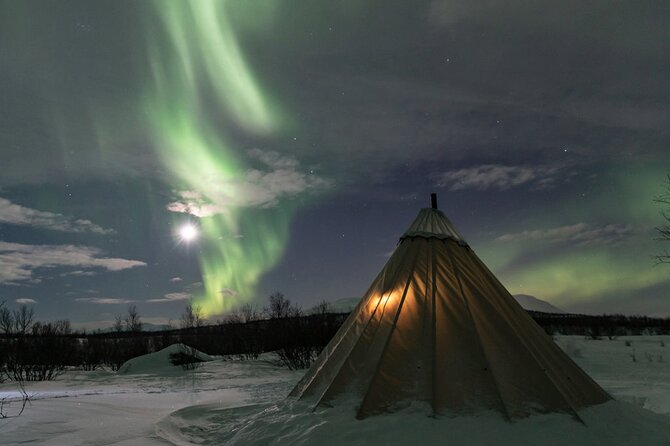
If you care about aurora photos, Abisko has a big advantage. The tour plan is built around the area’s tendency for clear skies, which matters because aurora hunting is a weather game. Even the best camera settings won’t help much when clouds blot out the sky.
What I find smart here is that the night isn’t one rigid script. The guides actively choose between multiple viewing options—on foot near a teepee, moving by modern 4×4, or going farther out by sleigh. That flexibility is what turns a trip from a single-location gamble into a true chase.
Also, this is the kind of place where darkness is real. Once you’re away from lit streets, the sky turns deep and stars become easier to use for framing. That’s huge for aurora photography because you’re composing both the sky and the scene.
You can also read our reviews of more tours and experiences in Sweden.
Price and value: what your money actually pays for
At $183.07 per person for about 4 hours, this isn’t a cheap add-on. But it’s also not just a guided walk. You’re paying for a bundle of practical pieces:
- Guidance with aurora photography basics, including using the provided equipment efficiently
- Rental of a DSLR camera and tripod, plus lens gear preset for northern lights
- Warm overalls and a head lamp, so you’re not hunting for Arctic clothing at the last minute
- Hot drinks (coffee/tea) and lingonberry juice, plus snacks
That equipment rental is the biggest reason the price can make sense. If you’ve ever tried to bring your own camera gear to subzero temperatures, you know how quickly it becomes expensive and stressful. Here, the goal is to remove friction and help you get usable shots without tech chaos.
Still, I’d treat it as a value proposition for people who want to learn and shoot, not only people who want a warm bus ride. If your main goal is simply to see the lights with zero camera learning, you may feel the cost is heavier than you expected.
The pickup at 7:15–7:45: a cold start you don’t have to manage
This tour is timed for the evening peak window. It starts at 7:45 pm, and pickup details are part of the comfort plan.
- If you stay in Abisko, you’re picked up between 7:30 and 7:45 pm. Plan to be in your lobby by 7:30 pm.
- If you stay in Björkliden, pickup is 7:15 pm.
Why that matters: aurora hunting is time-sensitive. You don’t want to waste the most active hours organizing yourself in the dark. Also, once you’re bundled into overalls and setup time begins, you’ll appreciate having less logistical overhead.
Return time is earliest 11:30 pm, and it can run later depending on aurora activity. That flexibility is part of the deal. If you’re trying to catch a very early train afterward, build in buffer time.
What’s included (and what’s not) so you don’t get stuck
This tour tries to solve the common “I’m cold and I can’t shoot” problems.
Included equipment and comfort items
You’ll get:
- Rental of the DSLR camera and lens
- Tripod
- Backpack
- Warm overalls
- Head lamp
And you’ll also be served:
- Coffee and/or tea
- Lingonberry juice
- Snacks
Not included but important
You still need to plan for two key missing items:
- Arctic boots: heavy-duty boots are available to rent during the tours, but they’re not included in the base package. If you’re coming with regular winter boots, you might want to rent for better traction and comfort.
- SD memory cards: the cameras use SD cards. The recommendation is a minimum of 4 GB, and SD cards are available for purchase (32 GB: 250 SEK).
If you’re the type who always shoots a lot, bring an SD card you trust. One of the simplest ways to improve your trip is to avoid the moment you realize you’ve run out of space while the sky is putting on a show.
The camera lesson that makes your photos better fast
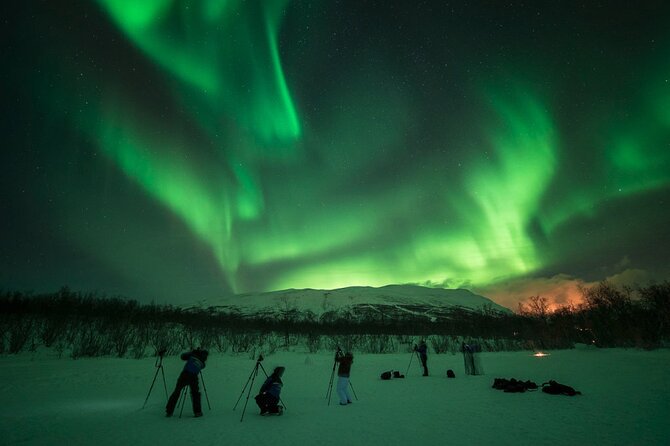
A big promise here is that the DSLR is preset for northern lights, plus you’ll get a quick run-through of the basics. That’s exactly what you want in a short, cold evening.
In practice, this kind of lesson means you focus on:
- getting your camera ready quickly
- understanding how tripod placement and stability affect results
- learning how to adjust settings in a way that matches aurora conditions
You’re not going in totally blind. Guides are there to help you set up and troubleshoot while you wait. Several people mention guides stepping in to help everyone capture good photos, and that’s the difference between a trip where you just point and click, and a trip where you actually get keepers.
Also, the preset camera approach helps you waste less time. In extreme cold, time is everything. The aurora might peak quickly, then fade. You want your setup working immediately.
Three chasing options: on foot, by 4×4, or out by sleigh
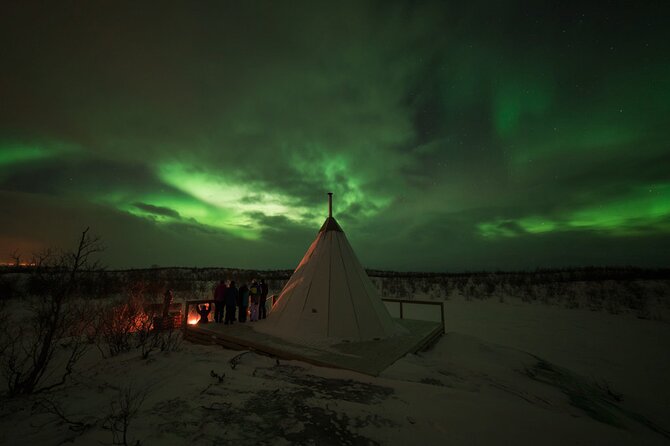
This is one of the most interesting parts of the night. Instead of repeating the same scene for hours, you can switch modes depending on the aurora forecast and the sky.
Option 1: chasing by foot near a teepee
When conditions are right, you may hunt for the aurora on foot near a nearby teepee. This is often the easiest option logistically. You’re close enough to adjust quickly and keep your gear moving without long transfers.
Why I like this mode: you can fine-tune composition and respond fast if the lights improve.
Possible drawback: if cloud cover hangs around, staying close means you may wait longer in a limited view corridor.
Option 2: a modern 4×4 van to chase the lights
If the forecast suggests better activity outside your initial area, you might move by modern 4×4 van. This is a practical choice when the sky is patchy. You’re not locked into one spot.
Why it’s valuable for photos: movement lets you follow where the sky looks best.
What to expect: it’s still a guided photo hunt, not a sightseeing tour, so you’ll likely spend time setting up and shooting when you stop.
Option 3: sleigh ride to a wilderness camp behind a snowmobile
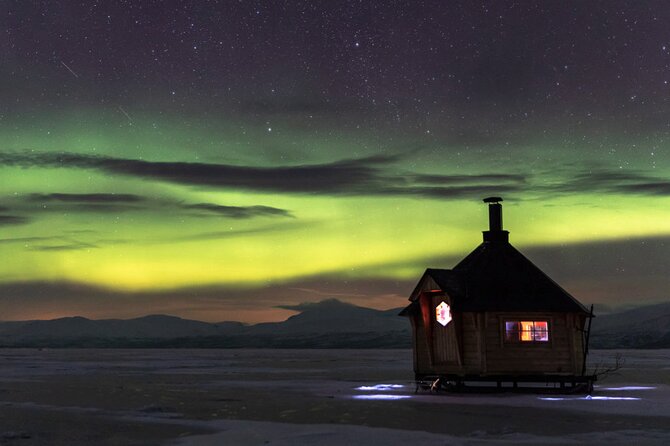
Some nights go further out by sleigh pulled behind a snowmobile, landing at a wilderness camp. If you want the most dramatic atmosphere, this is the most cinematic option.
People describe how the camp area can be completely dark, which is great for aurora visibility and for seeing stars properly. It’s also a more immersive way to experience the Arctic night, not just photograph it.
Possible drawback: it can be harder to change your mind about framing once you’re set at the camp. You’ll also want to trust the guide process because you’re committing to the location for the waiting time.
Stop in Abisko National Park area: what the night actually feels like
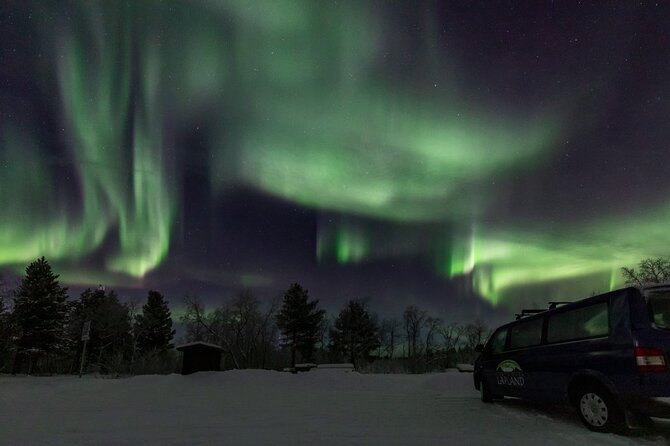
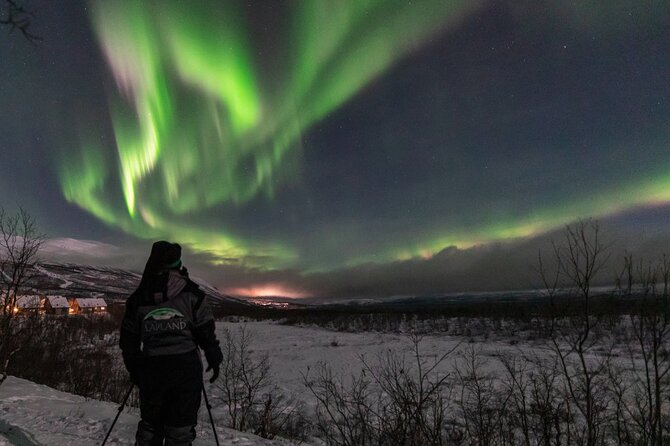
Rather than a quick check-in and a photo op, this tour is paced around waiting for the sky to respond. The core location is in and around Abisko National Park, and the evening often includes short moments of activity built around warm-ups and photo setup.
It can feel like:
- arrive and gear up fast
- brief instruction so you’re ready to shoot
- move (or don’t) based on where the aurora looks most promising
- wait, shoot, adjust, wait again
This is why warmth and snacks matter. If you get cold early, your hands don’t work right, and it’s harder to handle your tripod and camera. That’s also why the inclusion of warm overalls and hot drinks is more than a comfort perk. It supports your ability to keep shooting.
As for guides, names like Romy, Fabian, Ane, Gavin, Félix, Anna, and Michelle come up in the experience data you provided. If you get one of these guides, you can expect a strong push toward getting real photos, not just observing.
Group size: why max 8 is a big deal at night
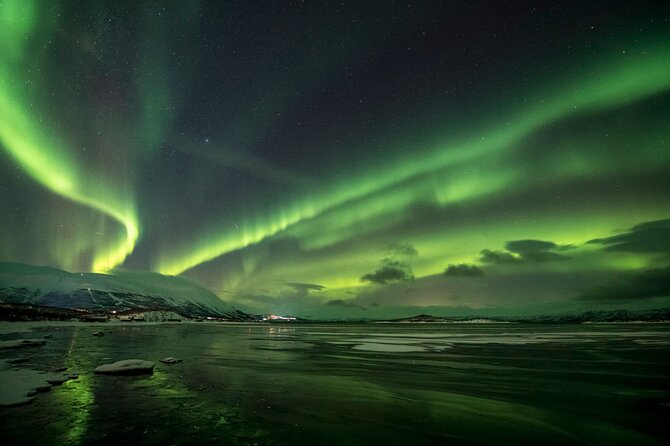
The tour is capped at eight travelers. That matters because aurora photography needs small adjustments. When groups are large, the line for help grows, and one person’s camera troubleshooting can slow everyone.
The guides here are there to help people set cameras up and stay comfortable while waiting. That kind of attention is easier with fewer people around.
Still, be realistic. If conditions are poor or the night plan requires extra time in one place, even a small group can feel more stationary than you hoped. I treat this as a night built around adaptability, not a moving slideshow.
How to set expectations so you leave happy
Here’s the honest emotional math: aurora hunting is a weather-and-activity lottery. Even when the odds are good, the sky can show only muted greens or clouds can steal the show.
This tour is designed to make that risk less frustrating by giving you:
- real camera gear you can use right away
- a shooting plan with help
- warmth, snacks, and multiple location options
But if your main goal is guaranteed aurora images, no guided photo adventure can promise that.
So my advice is to go in ready to treat the night as a learning session plus a chase. If the lights come out strong, you’ll be ready. If they don’t, you’ll still have a structured, guided Arctic experience with practical photo time.
Who this tour fits best (and who might want a different plan)
You’ll likely love this if you:
- want to learn aurora photography basics without guessing
- don’t want to rent or bring heavy camera gear
- prefer a guided night with warm gear and hot drinks
- enjoy small-group settings with quick help
You might reconsider if you:
- already know your aurora setup and feel DSLR rental doesn’t add much
- are traveling with your own camera but didn’t plan for cold operation and SD card capacity
- expect nonstop movement every hour no matter what
This tour is for people who want both atmosphere and results. If that’s you, the structure makes sense.
Should you book the Ultimate Aurora Photo Adventure?
I’d book it if you want the odds-improving Abisko setting plus a practical photo-focused system. The DSLR preset setup, the small group size, and the willingness to shift between on-foot, 4×4, and sleigh options are the core reasons this feels like more than a simple sightseeing outing.
Before you click confirm, do these two things:
- Make sure you have a reliable SD card (or plan to buy one on site).
- Pack for waiting in real cold and consider renting heavy-duty arctic boots if your footwear isn’t up to it.
If you want a warm night where you never think about settings, this may feel like more work than you expected. But if you want to come away with images you made on purpose, this is a strong match.
FAQ
How long is the Northern Lights photo adventure?
It runs for about 4 hours, with the return earliest at 11:30 pm and possibly later depending on aurora activity.
What time does the tour start?
The activity starts at 7:45 pm.
Is hotel pickup included?
Yes. Round-trip transfer from all hotels in Abisko and Björkliden is included with no additional charge.
What gear do I get for aurora photography?
You’ll have a rental DSLR camera and lens, a tripod, and a backpack. You’ll also receive warm overalls and a head lamp.
Do I need to bring an SD card?
Yes. SD memory cards are not included. The recommendation is a minimum of 4 GB, and you can purchase cards on site (32 GB: 250 SEK).
Are heavy-duty arctic boots included?
No. Heavy-duty arctic boots are available to rent during the tours, but they are not included in the base offering.
What options do you use to chase the aurora?
Depending on the aurora forecast and weather, you may hunt on foot at a nearby teepee, move by modern 4×4 van, or ride on a sleigh pulled behind a snowmobile to a wilderness camp.
What if the sky is cloudy or aurora activity is low?
This experience requires good weather. If it’s canceled due to poor weather, you’ll be offered a different date or a full refund.
Can I cancel for a full refund?
Yes. You can cancel up to 24 hours in advance for a full refund. If you cancel less than 24 hours before the start time, it won’t be refunded.